
Are you worried about cleaning your mini waffle maker? Don’t worry. In this article, you will learn how to clean a mini waffle maker.
Mini waffle makers are smaller than regular waffle makers. You can easily move and carry a mini waffle maker. It is suitable for small kitchens. If your kitchen does not have lots of space, then you need a small waffle builder so that you can keep it there without any problem.
Mini waffle makers look cute and make amazing waffles. You may need to make some more batches of waffles as your waffles are tiny.
Cleaning mini waffles may seem hard as the crevices of a small waffle builder are tiny. You need to clean it with lots of patience. But the processes of cleaning are easy. To learn how to clean a mini waffle maker properly, keep reading this article till the end.
Structure

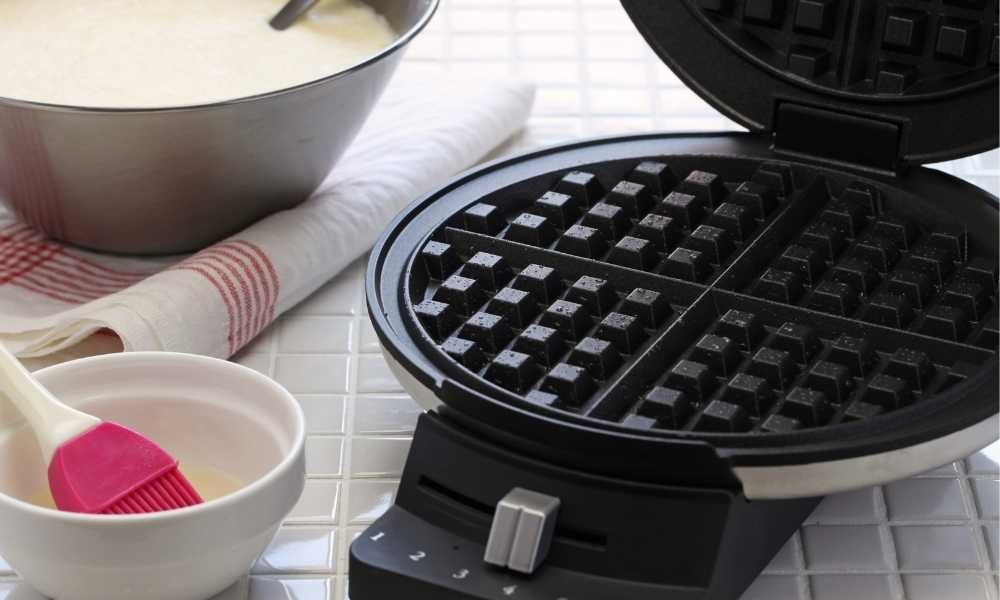
A mini waffle maker is a tiny waffle builder. It has small crevices and the grid surface is coated with a non-stick coating. Many mini chatter makers come with removable plates and some mini small makers come with non-removable plates.
You need to clean them according to their types. But you can’t submerge your mini chatter maker as it is an electric appliance.
Processes of Cleaning
Firstly, the cleaning process of a mini waffle maker is not that tough. But you need to know the structure of your waffle builder first. The cleaning processes of a mini chatter maker is given below:
Read The Instruction Manual
Firstly, you should read the instruction manual given by the manufacturer. Know the allowances and vital information about your mini waffle builder.
Once you know the information, start the cleaning process. If you have lost the manual, you can search for the information about your mini chatter maker on google.
You can also go to the website of the manufacturing company to know the information and allowances of your mini chatter maker. Know if your mini small maker is dishwasher safe or not.
Unplug the Mini Waffle Maker

Firstly, to start the cleaning process, you need to unplug your mini waffle builder. After that let it cool down. It will not cool down until you unplug it. Don’t touch the hot surface. Your fingers will be burnt if you start cleaning the hot small waffle builder. Once it is cooled down, you can start the next step.
With a Paper Towel
You can wipe off the grease and grimy build-ups with a paper towel.
1. Preheat the Mini Waffle Maker
First of all, preheat your waffle builder. Close the lid and preheat your mini waffle builder. Now unplug it and put a paper towel carefully over the grid surface.
Keep in mind that the small chatter maker is hot. So, don’t touch the surface. Otherwise, your fingers may get burned. Put the paper towel over the grid surface and close the lid.
Let it soak in the oil and grease for 6-7 minutes. After that, open the lid and remove the paper towel. Let it cool down and take another paper towel. Dab the new paper towel on the grid surface and wipe off gently to remove any left grease.
To know more about how to clean a waffle maker, keep reading.
Use a Soft Bristled Brush

You need to use a soft bristled brush to clean the accumulated baked-on batter from the grid surface and crevices. Don’t use a hard bristled brush which can cause damage to the non-stick coating.
You can use a soft nylon brush too. Brush the accumulated areas gently and clean the accumulations of baked-on waffle batter. After that, wipe off with a soft rag.
Pour Some Oil
Applying some oil in the accumulated areas can be an effective trick. Pour some oil over the accumulated waffle batter. Let it sit for 10 minutes.
Now dab a paper towel to remove the excess oil. Oil will definitely soften the stubborn baked-on accumulations. Take a rubber or plastic spatula to remove the softened accumulations.
Then wet a rag and wring the rag properly so that there is no dripping water. After that, wipe off the grid surface and crevices with that rag. Now dry off the surface and crevices with a paper towel.
Use a Hot Towel

In a mini waffle builder with non-removable plates, you need to clean it by wiping. So using a hot towel can soften the stubborn hard accumulations.
To do this process, wet a towel in hot water and wring it properly. Put the hot towel carefully over the grid surface. Hold the hot towel with oven mitts while putting it over the surface.
Now close the lid of your mini chatter builder and wait for 15 minutes. The steam and warmness will soften the accumulations and it will be loosened. Remove the towel. Scrape off the accumulations with a rubber spatula easily as it is softened. Wipe off gently with a clean soft rag.
Apply Vinegar
Vinegar is undoubtedly an amazing cleaner for non-stick kitchen appliances. You can’t pour vinegar directly on the crevices as you can’t rinse off the plates.
So you need to be tricky. Take a chopstick and wrap it with a paper towel. Make a mixture of vinegar and water. Pour one cup of vinegar and one cup of water into a mixing bowl and mix them properly.
Now dip the wrapped chopstick in the vinegar mixture and apply over the accumulated areas. Let it sit for one hour.
After one hour, wet a paper towel and wring the excess water. Now wipe off the accumulated areas with that damp paper towel. Wipe properly so that there is no moisture or vinegar. Dry off the surface and crevice with a dry paper towel.
Apply the Paste Of Baking Soda

Baking soda is a strong cleaner. Any stubborn stain and build-up easily go away if you apply baking soda. Before applying baking soda, you need to make a paste.
To make the paste, mix 2 cups of baking soda with 3 cups of hydrogen peroxide. You can use purified water instead of hydrogen peroxide. But hydrogen peroxide brings back the glow and keeps the appliance shiny like a new one.
So mixing with hydrogen peroxide is a better option. Make a thick paste. If you make it thin, it will be a liquid and you won’t be able to apply this. As you are learning how to clean a mini waffle maker, you should know the process in detail.
Now apply the thick paste over the accumulated areas properly. It will be a deep cleaning. Leave the paste over the surface for 2-3 hours. Apply the paste on the outside of your mini chatter builder as well.
Moreover, for 2-3 hours the paste will turn brown as it will soak up all the grease from the surface. Scrape off the paste and left baked-on waffle batter with a rubber spatula. Wipe off the surface and grid lines with a damp paper towel. Dry off the surface with a clean soft rag.
Clean a Mini Waffle Maker with Removable Plates
Learn how to clean a small waffle maker with removable plates from this article. Cleaning a mini chatter maker with removable plates is easy.
1. Plug-Out and Let it Cool
First of all, you need to plug out the mini chatter maker when you are done making waffles for the day. Enjoy the mini waffles, till then the waffle builder will cool down.
Once it is to cool down, you are ready to start the cleaning process.
2. Remove the Plates
Remove the plates from the waffle maker. Try to remove accumulations with fingers or with a rubber spatula. But don’t force and don’t be harsh as the non-stick coating is a sensitive area.
3. Soak The Plates Into Water
After removing the plates, soak them into hot water. Let it simmer for an hour. If your mini waffle builder is dishwasher safe according to the manual, then you can submerge it in soapy water by putting some drops of liquid dish soap into the water.
But most of the mini chatter makers don’t have the allowance to use dishwashers. So just soak in hot water and then start scrubbing with a soft rag. Rub gently. Try to get into the crevices.
4. Rinse and Dry
After rubbing for a while, rinse off with warm water. Rinse properly so that no residue is left. Wash the grid lines and crevices nicely.
Now take a paper towel or a soft rag and dry off your mini waffle builder. Dry properly and make sure that no moisture is left on the surface.
5. Put The Plates Back
After drying off, place the plates back in their position. Place them in the waffle maker properly and store your mini chatter maker in a convenient place in the kitchen.
Clean The Outside Of Your Mini Wafflebuilder
Cleaning the outside of the small waffle maker is important as well. You will not be interested in making your weekend treat in a grimy waffle builder. So you should keep the exterior of your mini chatter maker clean too.
Wet a rag in warm water. Now rub the outside of your mini chatter builder gently. Waffle batter may drop on the outside surface unknowingly and may become hard.
You can pour some oil over the accumulated area and wait for a while. After 5-6 minutes the accumulation will be softened and you can easily wipe off the area with a soft rag.
Paste of hydrogen peroxide and baking soda is also effective to clean the exterior and make it look shiny.You can dip a rag in vinegar mixture and rub the outside properly. Then wipe off with a damp paper towel. Dry off the exterior with a soft dry rag.
Precautions
As you are learning how to clean a small waffle maker, you should know the precautions too. You need to know what you should do and what you should avoid.
1. Don’t Use Harsh Tools
You should not use any abrasive metal-based kitchen tools as your mini waffle builder has a non-stick coating. Don’t remove waffles with a knife or any metal-based tools.
Don’t use steel wool sponges or metal based spatulas while cleaning a mini chatter maker. If your non-stick coating is damaged somehow, you will be in trouble. So, be careful about that.
2. Don’t Forget to Unplug
You can’t start the cleaning process when your small waffle maker is plugged in. If you accidentally try to do that, you will get an electric shock and your hands may get burnt as the surface is hot as well.
3. Let it Cool Down
Once you are done making waffles, unplug the waffle builder and let it cool down. You should wait for some time till it cools down. Otherwise, your fingers will burn and the non-stick can be damaged as well.
4. Don’t Use Cooking Sprays
You can put non-stick sprays if your small waffle builder is not coated with a non-stick coating. But if your mini chatter builder has a non-stick coating, then don’t ever put cooking sprays in it. It will leave nothing but grimy build-up on the grid surface and crevices.
So never use cooking sprays on the surface of non-stick mini chatter makers.
5. Avoid Dish Detergents
Most of the small waffle makers don’t have any allowance to use dishwashers. Though some manuals give permission, it is better to avoid using dishwashers that contain bleach.
Dish detergents are abrasive cleaners and create a negative impact. So you should avoid using any dish detergent on a mini chatter maker having a non-stick coating. Therefore, the strong chemical ingredients of dish detergent can damage the grid surface and the coating.
Conclusion
A mini waffle maker is easy to handle and light-weighted. It does not need lots of space to store in the kitchen. So you can have a small chatter maker even if your kitchen is small.
In short, as you have already learned how to clean a mini chatter maker, clean your small maker by using the tricks. Let us know your opinions through comments. Enjoy your day!