
Are you feel for cabinets? You can use cabinets. We are going to tell you how to install crown molding on kitchen cabinets. After learning all steps, you will set up your crown molding. You can do it at home if you want to with a little skill.
Not every kitchen configuration is the same. A kitchen can feature an array Of cabinets, and the aesthetic appeal can be further enhanced by adding intricate molding, lending it a more exquisite look.. If the L-shaped kitchen has cabinets, the cabinets on both sides should fill the corner cabinet at a 135-degree angle.
You need to know the basics of arranging wooden boxes because you want to learn how to make cabinets. When working alone it can be difficult to install trim pieces like crown molding. Here are a few tips to make crown molding easier.
Indication:
Lots of nail work to do on how to install crown molding on kitchen cabinets. This will reduce the damage to the mold. You need to buy an 18-gauge finish nailer and air compressor to work perfectly. Their kits will provide the necessary nail equipment. So you have to buy less equipment separately.
Tools And Materials you’ll need to total idea about this project:
- Crown molding
- Backing wood strips (2×2 or 3/4-in x 1-1/2-in)
- Wood glue
- Hammer and nails
- Miter saw
- 18-gauge nail gun and air compressor
- Drywall hole patch
- A miter saw is an essential tool for this project
Step 1
The first task is to cut the filler wood pieces well. After making a base, the crown should be molded and nailed. Now measure the length of the wood. Cut direct 3/4-x x 1-1 / 2-in wood ranges to fit the front and sides of each cabinet. The length of the wood will go along the entire upper edge. Join each piece at an angle of 45 degrees to the corners, getting base under the corners of the mold. Let it dry well.
Step 2
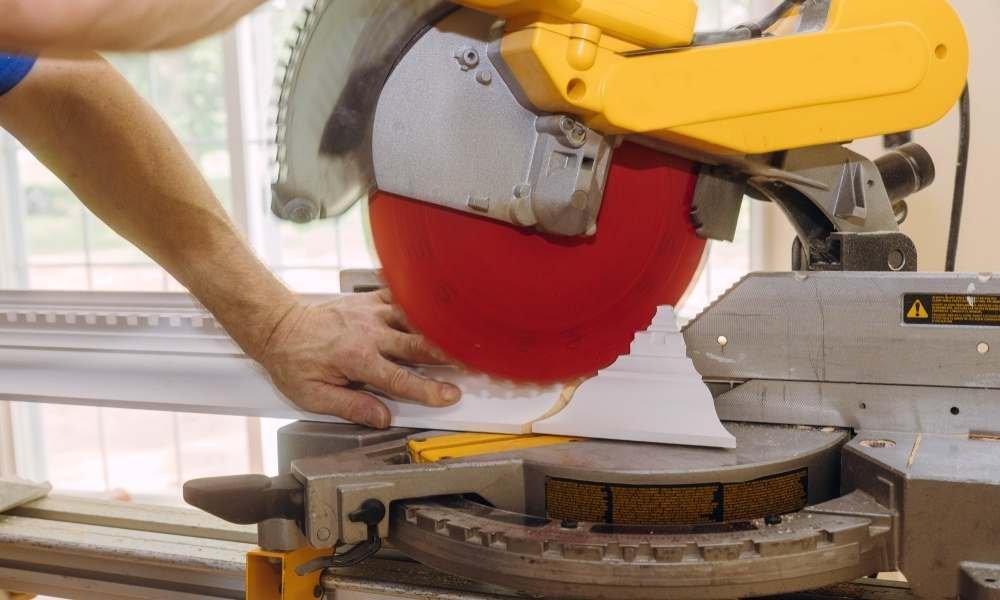
Take the amount Cut the length of the crown mold. It will be at least a few inches longer than the side of your cabinet hold on for a while. Mark the place where you will cut the meter. You can then cut the pieces into shapes, but this method increases the likelihood of errors that can leave some gaps in the mitted angle.
Set 45 degrees after looking at your meter. Since you are cutting multiple molding strips, you can temporarily use two strips of wood as a guide on the table, line the bottom edge of the molding with the top edge of the cabinet and it will have nails in the backing wood. If you are pulling it right away into your cabinet, remember to place 1/8 inch above your door. It can open freely. You create an angle that will crave minimal filler.
Step 3

Make a molding strip 8 inches longer than the length of the front of the cabinet. Meter the edge that fills the first rangs and hold the edges at one place. Identify a partner where the other 45-degree cut should go to the next corner.
Apply the end of this strip and then the backing wood with a nail gun. Where the molding pieces meet, nail with both pieces to secure the connection.
How to Build An Outdoor Kitchen With Metal Studs
Step 4

First, cut your saw base length to a 3/4-x x 1-1 / 2-in board.
Remove the backing on the tape and the flat edge against the fence and saw base.,
Press on the taped area and remove the crown mold.
Rotate the saw in a 45-degree meter setting.
Rotate it to another 45-degree setting, make a second cut, and remove the center section.
Now you have support for molding your crown which can also tell you the exact position of your saw blade.
See More: How to Organize Kitchen Cabinets in a Small Kitchen
For example, first cut a 3/4-x x 1-1 / 2-in board the length of your saw flour. Remove the backing on the tape and the flat edge against the fence and saw base, Press on the taped area and remove the crown mold. Rotate the saw in a 45-degree meter setting and cut with a 3/4-x x 1-1 / 2-in board. Rotate it to another 45-degree setting, make a second cut, and remove the center section. Now you have support for molding your crown which can also tell you the exact position of your saw blade.
Step 5

You are free to run the final mold, the mold selection has to be molded for one end to the opposite end. For this start the piece is about a quarter-inch hospital. Shave a small amount by looking at your meter and keep checking until the piece fits. Like others, it nails. Then mold the final side in place.
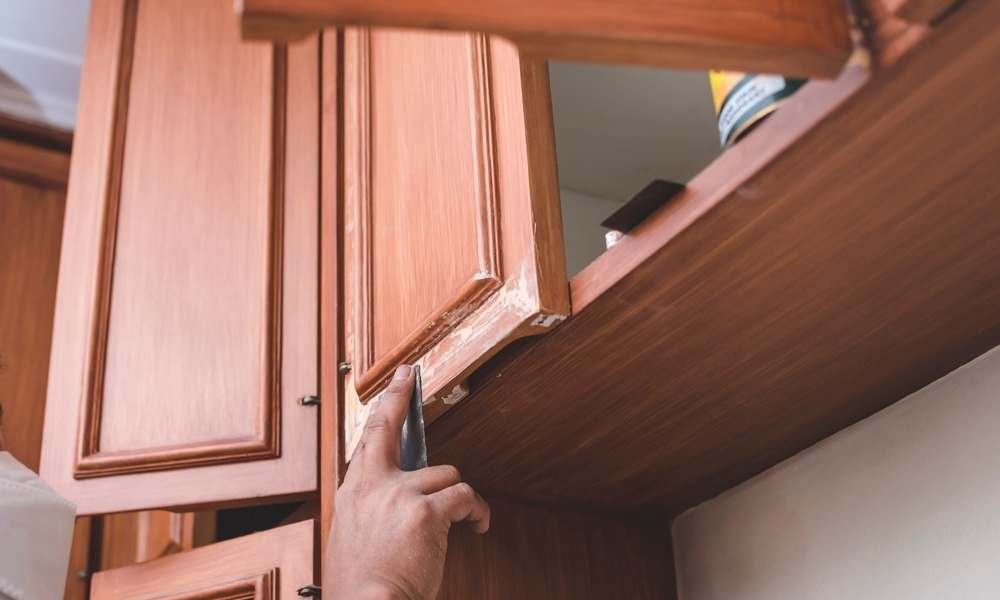
Step 6

Now you can see the tiny gaps where each of the corners meets. You can also see the holes in each nail. Fill in the gaps. Now you need to use some drywall hole patches to smooth the surface. You need to use two coats of paint to finish the molding cabinet. Things can get a bit complicated if you use wood stains on cabinets. You may want to take a cabinet door to the home improvement store. Then ask an expert which stain would be better to use for the molding strip.
There are many short steps to learning how to install crown molding on kitchen cabinets.
We have said a few short steps here:
- Cutting strips of 5/4 ”pine in length and width which depend on the size of the cabinet. These will be filler pieces.
- Make rabbit cuts into filler pieces so that the piece fits snugly over the cabinet and over the cabinet door.
- Once the cuts are all made, spray the pieces of the filter so that the color of the cabinet is visible.
- Mount the filler pieces to the cabinet to use super glue and use wood glue to attach it permanently to the cabinet.
- From the side piece in. Then secure that piece with a wooden screw.
- Place the crown mold next to the cabinet. Make sure they are firm against the wall. Use a pencil to impress the inside of the correct measurement for cutting the crown. Impress an arrow inside to determine which corner the meter cut should go to.
- Hold the crown mold sideways. Back it presses securely against the miter saw fence. To prevent it from slipping, you can use some clean polyurethane glue. A few small pieces of wood to glue at the base of the tax to act as an end.
- Turn the meter to 45 degrees based. On the direction of the mark drawn on the crown mold while the measurement. Cut the piece.
- To cut the sister into the opposite piece of crown molding, turn the saw at the opposite 45-degree angle.
- Make a miter cut for the front part of the crown. Then, cut the sister as before
- For any cabinet with an inner corner, cut the meters with opposite 45-degree angles. the meter corners of the crown molding cut themselves.
- Fill all nail holes with wood putty.
- Cool around the crown mold where it is combined with the ceiling to give it a finished look.
See More: Best LED Lights For Kitchen Ceiling
Concluding
In a general cabinet, you will see the use of many angles. An angle, outside or inside, where two pieces of crown molding seem to be together. Crown molding or crown molding stops cutting angle. And you will benefit from knowing how to install crown molding in kitchen cabinets.