I still remember the first time I sharpened a kitchen knife with a whetstone. I was nervous. But once I got the technique right, my knife worked perfectly. It was sharp and easy to use, Making cooking A lot more enjoyable. Learning how to sharpen a kitchen knife with a whetstone is a simple but important skill. A sharp knife makes cooking safer And faster. Plus, It saves money. No need to spend on replacements or services. In this guide, It’s easier than it seems. With a little practice, you’ll be able to do it yourself and keep your knives in great shape.
Why Sharpening Your Knife is Important
A sharp knife makes cooking easier and safer. It helps you cut food quickly and precisely. You don’t need to press hard, which gives you more control. This lowers the chance of the slipping.
Sharp knives are also faster. They slice through food with less effort. That means you get your prep work done in less time.
How Dull Knives Affect Your Cooking
Using a dull knife can slow you down. It makes cutting harder and can lead To uneven slices. The more pressure you apply, The more likely they will slip.
Dull knives also damage food. For example, A blunt knife can squish tomatoes or crush herbs. A sharp knife keeps food intact And preserves its freshness.
Prepare the Whetstone
First, Let’s get the whetstone ready. If you’re using a water stone, Soak it for about 10-15 minutes before you start. This helps create A slurry on the stone’s surface, Which makes sharpening more effective. You’ll see the stone start to look A little murky—that’s a good sign! If you’re using an oil stone, Apply a light layer of oil to the surface. You want it to be slippery, But not dripping. It helps reduce friction And prevents the stone from drying out during the process.
Here’s a personal tip: Don’t skip the prep step. I made that mistake once and found myself frustrated when the knife didn’t sharpen properly. The stone was too dry, and it took much longer to get the desired result. A little prep time goes a long way.
Position the Knife
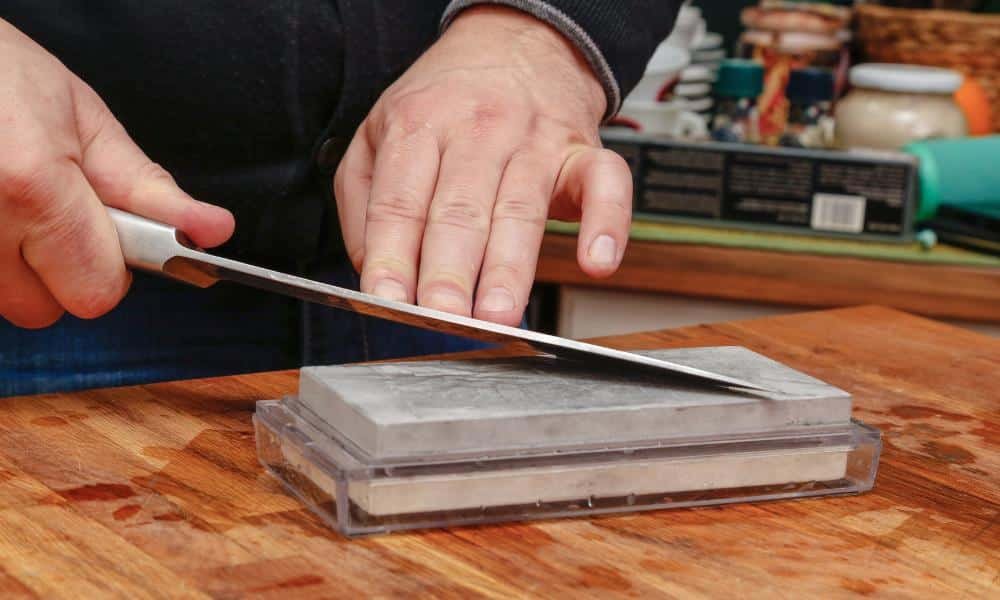
The key here is maintaining the right angle. For most kitchen knives, Aim for a 20-degree angle. It’s the sweet spot for A sharp edge without risking damage To the blade. You can easily achieve this angle by imagining the blade sitting flat against the stone, Then lifting it up slightly until you have A 20-degree incline.
Here’s a quick trick to make this easier: Use the “paper test.” Take a piece of paper, and hold your knife at the angle you think is right. Slices through the paper cleanly, you’ve got it right! If it struggles, adjust the angle a little until you get a smooth cut.
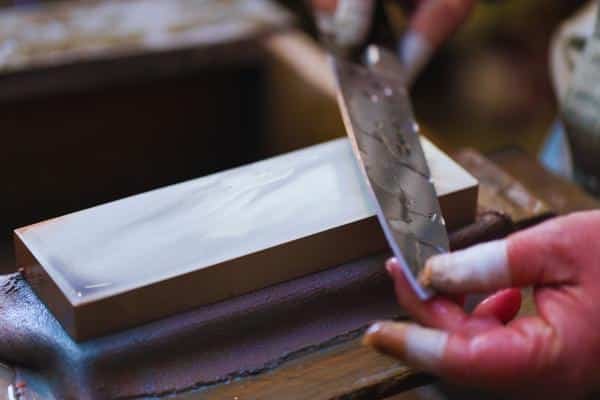
Sharpening Process
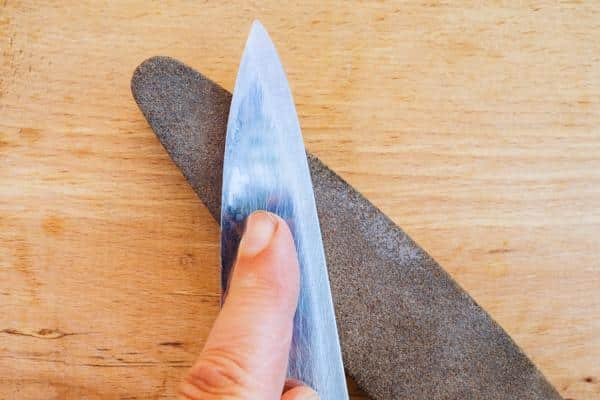
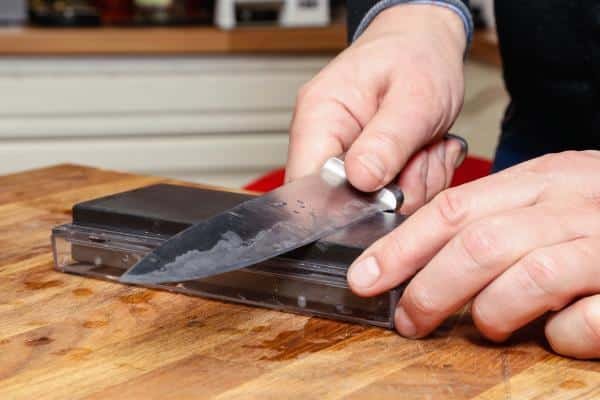
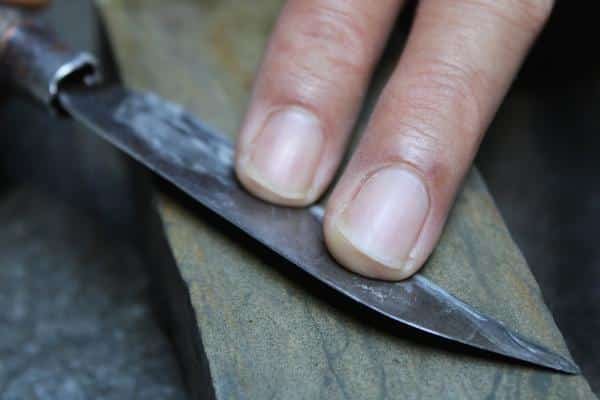
Now comes the fun part—sharpening! Start by placing the heel Of the knife on the stone and work your way to the tip. Use alternating strokes (front to back) With light pressure. Don’t rush—focus on steady, Even movements. It’s like giving a spa treatment! Work your way along the entire length of the blade. After about 5-7 strokes on one side, switch to the other side.
Here’s an important tip: Sharpen both sides evenly. It’s easy to get caught up in one side, but balancing the strokes ensures the edge is uniform. If you’re not sure, feel the blade after each set of strokes to check for smoothness and consistency.
Testing the Sharpness
Once you’ve sharpened both sides, it’s time to test. The easiest method is the paper test again. Hold a piece of paper in the air and try slicing through it. A sharp knife should glide through without tearing. Another great test is the tomato test. A sharp knife will cut A tomato without crushing it. If the knife struggles To cut either the paper or the tomato, go back To the stone And give it a few more strokes.
Don’t worry if it’s not perfect on the first try. Sometimes a little extra sharpening is needed, Especially if the knife was dull. Keep practising, And you’ll quickly get the feel for it!
Practical Tips for Perfect Sharpening
Maintaining Consistency
Keep the knife at a steady 20-degree angle as you sharpen. Small adjustments help maintain consistency. You can practice in front of A mirror to check your angle. Over time, It’ll become second nature, And your sharpening will be more precise.
How Often to Sharpen Your Knife
How often you sharpen depends on use. For daily use, Sharpen your knife every 2-3 months. For heavier tasks, sharpen it more often. If you use less, sharpen it once or twice a year. Always listen —it will tell you when it needs sharpening.
Post-Sharpening Care
After sharpening, hone your knife regularly. Honing helps keep the edge aligned. This extends the time between sharpenings. Clean and dry your knife right after use to keep the edge in top shape. Either in a block or on a magnetic strip.
Different Types of Kitchen Knives and When to Sharpen Them
Chef’s Knife
It is the most used knife in the kitchen. It’s great for chopping, Slicing, And dicing. To sharpen it, hold the knife at a 20-degree angle. Work from the heel to the tip with smooth strokes. This will keep sharp And ready for any task. Check out the best kitchen knife set under 100 for high-quality knives that meet your kitchen needs.
Serrated Knives
You can’t sharpen serrated knives with a whetstone. The teeth need a different approach. Use a rod or ceramic honing tool to sharpen the teeth individually. Run the tool along each tooth to bring back the edge. For deep sharpening, consider professional help.
Paring and Utility Knives
The knives are smaller but still need sharpening. Use the same 20-degree angle but sharpen them more often. These knives can lose their sharpness quickly. Apply light pressure when sharpening to maintain the blade’s edge.
Whetstone Maintenance and Care
After each use, Rinse your whetstone with water to remove any metal particles. You can use a brush To scrub off any stubborn bits. Let the stone dry completely before storing it. Store it in A dry place To prevent moisture from damaging the surface. Proper cleaning And storage will keep your stone in good condition for longer.
Over time, Your whetstone can become uneven from use. This can affect sharpening results. To flatten the stone, Use a flattening stone or a diamond plate. Gently rub the stone back and forth until the surface is level again. Flattening the stone regularly ensures even sharpening And prolongs the life of the whetstone.
Conclusion
Sharpening a knife with a whetstone might seem tricky at first, But with a little practice, It becomes easier. Don’t get discouraged if it doesn’t feel perfect right away. Keep practising, And soon, you’ll be sharpening like a pro. It’s a rewarding skill that will make your cooking safer, Faster, and more enjoyable.
After each use, always clean And dry immediately. This simple step helps maintain the blade’s sharpness And keeps it in top condition. Proper care will extend the life of and keep it ready for your next meal.