I wanted a Blizzard. But it was late, and I didn’t want to drive. So I used my Ninja blender. In just minutes, I made one at home. It was thick, cold, and full of cookie chunks. Better than store-bought. That’s how I learned how to make a Blizzard with a Ninja blender. No fancy tools. Just simple steps and a few ingredients. Anyone can do it—even on a lazy night. In this guide, I’ll show you exactly how. You’ll love how easy it is. And your taste buds will thank you.
What Is a Blizzard and Why It’s Special
A Blizzard is more than just ice cream. It’s cold, thick, and packed with mix-ins. Cookies, candy, brownies—every spoonful surprises you. It’s not soft-serve, not a milkshake. It’s dessert you eat with a spoon.
Making one at home is simple. You choose what goes in. You control the flavor. No waiting in line. No guessing what’s inside. It’s cheaper, too. And always fresh.
To get that texture just right, you need a strong blender. Something that can crush chunks and still keep things smooth. A blender that won’t melt your mix. That’s where the right machine matters.
Choosing the Right Blender (Why I Use a Ninja)
Not all blenders are the same. Some can’t handle thick ice cream. Others leave chunks too big or melt the mix. You need power, sharp blades, and control.
That’s why I use a Ninja. It blends fast but doesn’t overheat. It breaks down cookies and candy with ease. And it gives you that smooth, spoonable treat every time.
You don’t need to spend a lot. Many people ask about the best blender under $50. Some budget Ninja models fit that range and still work great. For homemade treats, they do more than enough.
Ingredients You’ll Need (Simple and Flexible)
Start with good ice cream. Vanilla works best. Go for full-fat. It makes the mix smooth and rich.
Next, grab some milk. Whole milk gives a creamy base. Almond, oat, or soy milk also work well. Just pick what suits your taste.
Now for the fun part—mix-ins. Use crushed Oreos, brownies, or candy pieces. Keep the chunks small. You want a bit in every bite.
Add-ins are up to you. A pinch of salt brings balance. A swirl of chocolate syrup adds depth.
Need dairy-free? Use coconut ice cream. Want less sugar? Choose low-sugar treats. It’s easy to make it your way.
01. Soften the Ice Cream
Take the ice cream out of the freezer. Let it sit for 5 to 10 minutes. It should be soft but not melted. A spoon should glide through with no push.
02. Prep Your Mix-ins
Crush or chop your mix-ins. Keep the pieces small. Big chunks won’t blend well. Think bite-size.
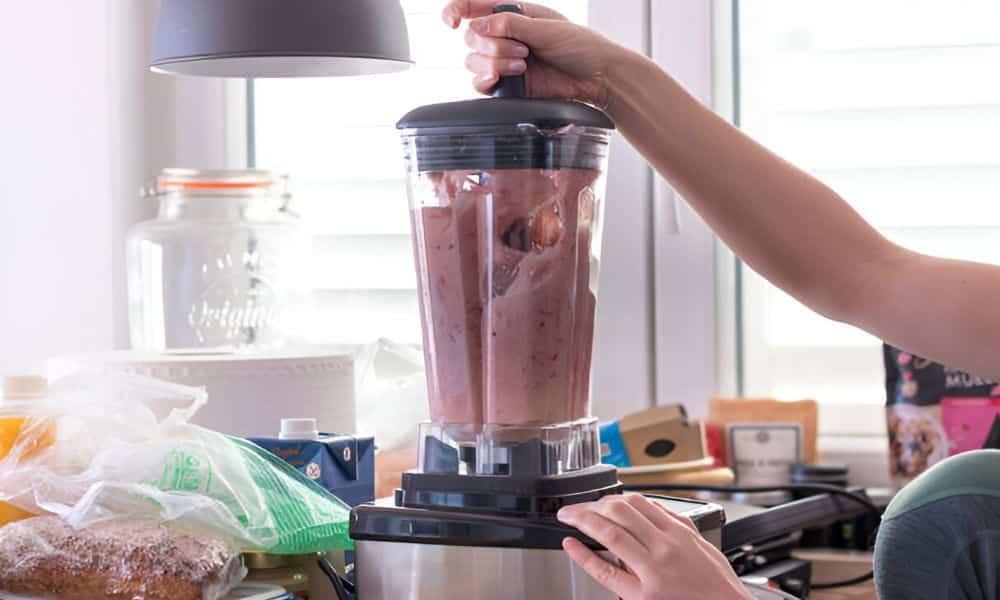
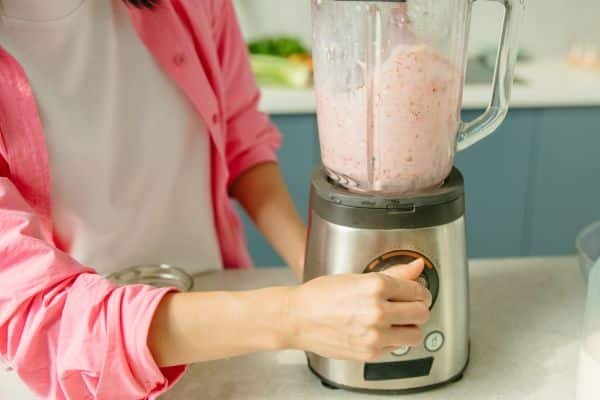
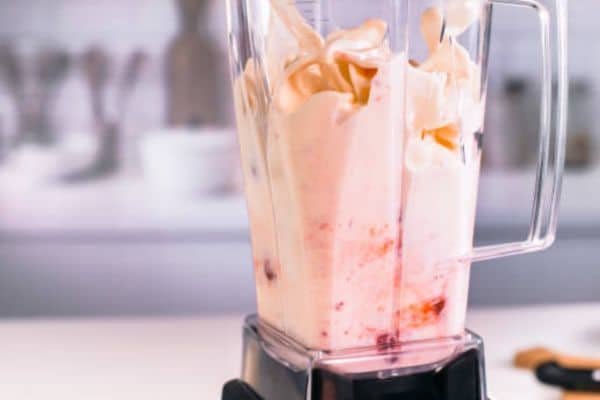
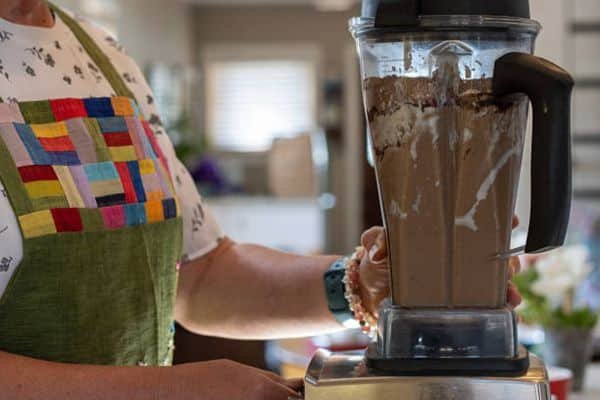
03. Add Ice Cream and Milk to the Blender
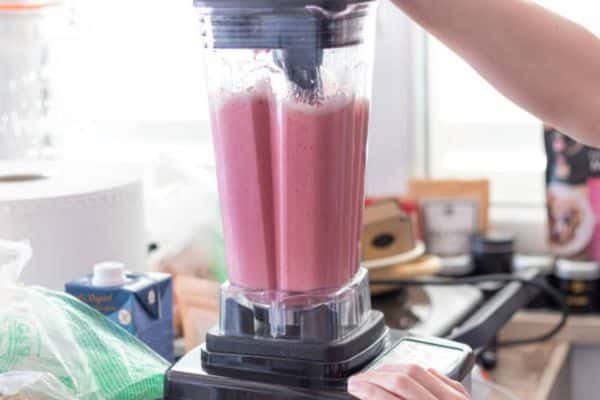
Scoop two cups of ice cream into your Ninja. Pour in a splash of milk. Start with ¼ cup. You can add more later if it’s too thick.
04. Pulse, Don’t Blend
Use short bursts. Don’t run it like a smoothie. You want it thick and spoonable. The goal is soft, not soupy.
05. Add Mix-ins and Pulse Again
Toss in the crushed bits. Pulse once or twice. Stop before it turns into dust. You want chunks in every bite.
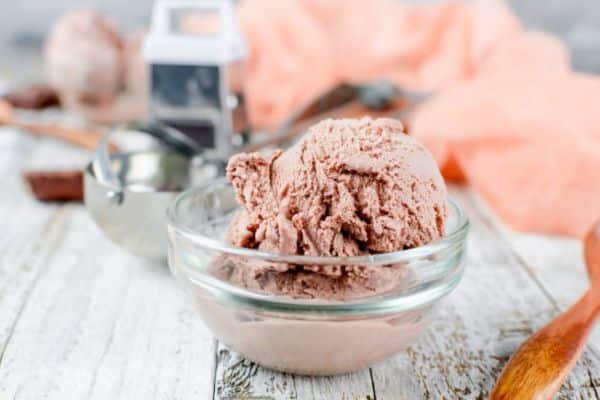
06. Serve and Enjoy
Scoop it into a cold bowl or cup. Add extra toppings on top if you like. Grab a spoon. You’re done.
Pro Tips to Get the Perfect Texture
Texture makes the treat. Too runny, and it feels like a shake. Too stiff, and it won’t blend right. These tips will help you get it just right.
Don’t over-blend
Short pulses work best. Long blending melts the ice cream. You want it thick, not smooth like a drink.
Use chilled bowls or cups
Put your bowl in the freezer before you start. It keeps the treat cold longer and stops it from melting fast.
Stir in extra mix-ins after blending
Save a few bits for later. Mix them in with a spoon. This gives you bigger chunks in every bite.
Start with less milk
Use just a little at first. You can always add more. Too much from the start will ruin the texture.
Keep it cold. Keep it thick. That’s the trick.
Favourite Flavour Combos to Try
This is where the fun begins. You can stick with the classics or get creative. Your Ninja blender can handle all kinds of chunky mix-ins—cookies, candy, even brownies.
Oreo Crunch
Vanilla + crushed Oreos + a pinch of salt. It’s simple, sweet, and always a win.
Brownie Blast
Chocolate + brownie chunks + mini chocolate chips. Rich, fudgy, and full of texture.
Peanut Butter Cup Perfection
Vanilla + chopped Reese’s + a swirl of peanut butter. Creamy with a nutty kick.
S’mores Dream
Vanilla ice cream + graham cracker bits + chocolate pieces + mini marshmallows. Tastes like summer.
Mint Cookie Chill
Mint chip ice cream + crushed Thin Mints. Cool and crunchy in every bite.
Mix, match, and make your own. Your spoon won’t be bored.
Can You Use a Budget Blender Instead?
A common question is, “Do I need an expensive blender?” The answer is no. You don’t need top-shelf gear to make a great Blizzard.
In fact, many of the best blenders under $50 work just fine. Some budget Ninja models blend ice cream and mix-ins without a struggle. They may not have all the fancy settings, but they get the job done.
What matters more is how you use it. Soften your ice cream. Chop your mix-ins. Use short pulses. These small steps make a big difference.
A smart method beats a high price. Always.
Common Mistakes and How to Avoid Them
Even simple treats can go wrong. But don’t worry. These quick tips will help you skip the mess and get it right the first time.
Too Much Milk
More milk means less texture. Start small. Add just a splash. Too much turns it into a milkshake.
Rock-Hard Ice Cream
Frozen solid? Let it sit out. A few minutes makes it soft enough to blend. No stress on the machine.
Big Mix-ins
Whole cookies or candy bars don’t blend well. Chop them first. Small chunks blend better and taste better, too.
Over-Processing
Too much blending kills the crunch. Use short pulses. Stop once it looks thick and chunky.
Follow these, and your Blizzard will turn out just right—every time.
Cleaning Up Your Ninja Blender (Fast and Easy)
No one loves cleanup. But this part is quick—promise.
Quick Rinse Tip
Right after blending, rinse the pitcher with warm water. Don’t wait. Dried ice cream sticks fast.
Soapy Pulse Trick
Fill halfway with warm water. Add a drop of dish soap. Pulse for a few seconds. It scrubs itself clean.
Drying Suggestions
Dump the water. Rinse again. Then air-dry upside down. You’re ready for round two—anytime.
Easy to use. Easy to clean. That’s why I keep coming back to my Ninja.
Final Thoughts
Making a Blizzard at home is easy. It’s fast, fun, and always hits the spot. Once you try it, you may not go back to the drive-thru.
You can tweak every part. Choose your mix-ins. Change the milk. Go dairy-free. Make it lighter or richer. You’re in charge.
So grab your Ninja blender and give it a try. Your perfect combo is waiting. And hey—share it with a friend. Or keep it all to yourself. I won’t judge.
FAQs
Can I use frozen yogurt instead of ice cream?
Yes, you can. Frozen yogurt works well, but the texture may be a bit softer. It’s a great option if you want something lighter.
What’s the best milk to use?
Whole milk gives a rich, creamy blend. For dairy-free options, try oat or almond milk. Just start with a small amount and adjust as needed.
Can I store leftovers?
You can, but the texture changes. It becomes harder and less creamy. For best results, enjoy it fresh right after blending.