I still remember my first blend in a Vitamix. Frozen mango, spinach, and yogurt turned smooth in seconds. It felt like magic. But cleaning it? That was another story. Sticky bits stayed behind, and I wasn’t sure what to do. I asked myself, how do you clean a Vitamix blender without stress? Over time, I found answers. Not from manuals—but from real use, every day. In this guide, I’ll show you the simple steps that work. Fast, easy, and safe. You’ll keep your blender spotless and your smoothies fresh. Let’s dive into a method that actual
Why Cleaning Your Vitamix Blender Matters
Old food in your blender doesn’t just look bad. It changes the taste of your next recipe. Even a few drops of leftover soup can create a sour smell. That smell can soak into the container and stick around.
A clean Vitamix keeps your food tasting fresh. It blends better, smells better, and lasts longer. Dirty parts slow it down and wear it out faster. That’s why regular cleaning is key.
I’ve tested some of the best blenders under $50. They work fine but don’t clean as well. Food sticks more. Plastic gets foggy. The Vitamix? It cleans up fast and stays sharp.
Quick Clean: Your Go-To Daily Method

Cleaning your Vitamix right after use makes everything easier. It takes less than a minute and keeps stains away. I do it every time I blend—no excuses.
Here’s how:
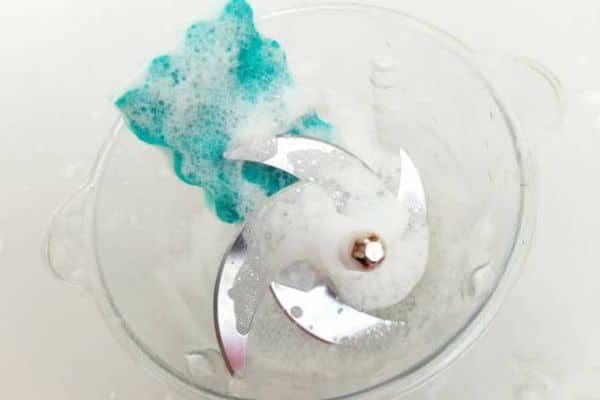
- Rinse the container right away with warm water. Fill it halfway.
- Add two drops of dish soap. That’s all you need.
- Put the lid on. Set the container back on the blender base.
- Blend on high for 30 seconds. Watch the soap swirl and clean every corner.
- Rinse well with clean water. Let it dry upside down.
That’s it. No scrubbing. No mess.
Deep Clean – Once a Week or As Needed
Even with daily cleaning, your Vitamix needs a deeper scrub now and then. Foggy walls, sticky oils, or strange smells are signs it’s time. I do a deep clean once a week. It keeps everything fresh and running smooth.
Start with this easy soak:
- Fill the container halfway with warm water.
- Add one cup of white vinegar.
- Let it sit for 4 to 6 hours.
- Pour it out. Rinse well.
For extra shine, add a spoon of baking soda before the soak. It lifts stains and helps remove odors. A squeeze of lemon adds a clean, fresh scent.
Avoid dishwashers. They use high heat that can warp the plastic. It may also loosen the blade over time. Always wash by hand. It’s faster, safer, and better for your blender.
Parts You Shouldn’t Forget
Some mess hides in places you don’t see. The lid, plug, gasket, and blade base often trap small bits of food. Over time, that leads to stains, smells, and even mold. These parts need care too.
Take the lid and plug apart. Wash both with warm, soapy water. Use your fingers or a soft brush to clean tight spots. Rinse well and let them dry fully.
Some models have a gasket near the blade. Check for one. Remove it gently and clean both sides. Be careful not to stretch or tear it.
Look under the blade. Food often sticks there. Use a soft bottle brush or toothbrush. Don’t scrub hard—just swirl lightly with warm soapy water.
Common Mistakes and How to Avoid Them

Cleaning a Vitamix seems easy. But a few small mistakes can cause big problems. I’ve made them myself. Here’s what to avoid—and what to do instead.
Harsh brushes scratch.
Metal or stiff scrubbers leave marks on the plastic. These scratches trap food and stains. Use a soft sponge or a bottle brush. It cleans well without damage.
Storing with the lid on traps moisture.
That damp space turns into a perfect home for mold. Always store your Vitamix with the lid off or loosely placed. Let air flow through.
Skipping the rinse is risky.
Thick blends like peanut butter or hummus stick fast. Rinse right after pouring. Even a few seconds of warm water helps. Waiting makes cleaning harder later.
Pro Tips From Years in the Kitchen

After using my Vitamix every day for years, I’ve picked up a few tricks that make cleaning even easier. These little habits save time and keep the blender in top shape.
1. Warm water before thick blends.
Before blending nut butter or frozen fruit, rinse the container with warm water. It stops sticky food from clinging to the walls. Cleanup becomes faster.
2. Always blend with the lid on tight.
Leaks happen fast. A tight lid keeps splashes out of the base and saves time later. A clean base lasts longer.
3. Use a drop of lemon.
Once a week, I blend warm water with a squeeze of lemon. It freshens the container and removes any lingering smell.
4. Dry with the lid off.
Moisture leads to mold. I always air-dry my Vitamix with the lid resting on the side, not sealed shut.
5. Keep a soft brush nearby.
I leave a bottle brush next to the sink. It takes five seconds to grab it and swish around the blade area. It’s a simple habit that works wonders.
Frequently Asked Questions
Can I put my Vitamix in the dishwasher?
It’s not the best idea. Some containers are labeled dishwasher-safe, but high heat can warp the plastic. It may also weaken the seal near the blade. I always wash mine by hand. It’s faster, safer, and helps the blender last longer.
How do I remove stains from the container?
Stains build up over time, especially from berries or soups. Fill the blender with warm water and add white vinegar. Let it soak for a few hours. You can also add a bit of baking soda for extra scrubbing power. Rinse well and let it dry upside down.
Why does my Vitamix smell after use?
Leftover food causes smells. Even a tiny bit under the blade can turn sour. The best way to avoid this is a quick clean after every use. A deep clean once a week also helps. This is part of how do you clean a Vitamix blender the right way.
Conclusion
Keeping your Vitamix clean isn’t hard. A quick rinse after each use keeps stains and smells away. A deep clean once a week removes buildup and keeps every blend fresh. These simple steps help your blender last longer, look better, and work like new.
I’ve cleaned my Vitamix after soups, shakes, and sticky nut butters. I’ve made mistakes and learned better ways. Everything in this guide comes from real use in a real kitchen.

