
Last summer, I stood in my kitchen craving something cold. I had no ice cream maker. Just frozen bananas, cream, and my Ninja blender. I tossed everything in and pressed blend. In less than a minute, I had the creamiest treat I’d ever made. That moment changed dessert in my home forever. Learning how to make ice cream with Ninja blender became a weekly habit. It’s fast, easy, and fun. You don’t need special tools or fancy skills. Just a blender, frozen fruit, and a sweet tooth. Let’s make your next frozen treat the best one yet.
Why Use a Ninja Blender for Ice Cream?
Making frozen treats takes power. Ninja blenders bring that power to your kitchen. They handle frozen fruit with ease. They crush ice without stress.
The blades are sharp and angled. That design pulls food down as it spins. Thick mixes turn smooth fast. There’s no need to fight with lumps.
Speed is another win. Blending takes seconds. You don’t wait around. You get creamy results without the extra work.
A Ninja costs less than most ice cream makers. It works year-round, not just for dessert. Many people learn how to make ice cream with Ninja blender and never look back.
Some of the best blenders under $50 can do the job too. Look for strong motors and solid jars. A simple setup can give you smooth scoops every time.
Ingredients You’ll Need (Simple and Flexible)
You don’t need a lot to make great ice cream. Just a few fresh items from your kitchen can turn into a creamy dessert.
Start with frozen fruit. Bananas are a favourite because they blend smoothly and taste sweet. Mangoes give a soft, tropical flavour. Berries add colour and a little tart bite. Keep them sliced and stored in freezer bags.
Next, pick a base. Heavy cream makes it rich and thick. Almond milk works great for a light taste. Coconut milk adds a soft, sweet flavour and works well for dairy-free blends.
Now add sweetness. Honey gives a smooth finish. Maple syrup adds warmth. Dates bring natural sugar and a hint of caramel.
Want more flavour? Add a little vanilla. Try cocoa for a chocolate touch. Drop in chocolate chips, nuts, or cookie bits for crunch.
Step-by-Step Guide: How to Make Ice Cream with Ninja Blender
This is the fun part. In just a few easy steps, you’ll have smooth, homemade ice cream in your bowl.
Step 1: Add Frozen Fruit
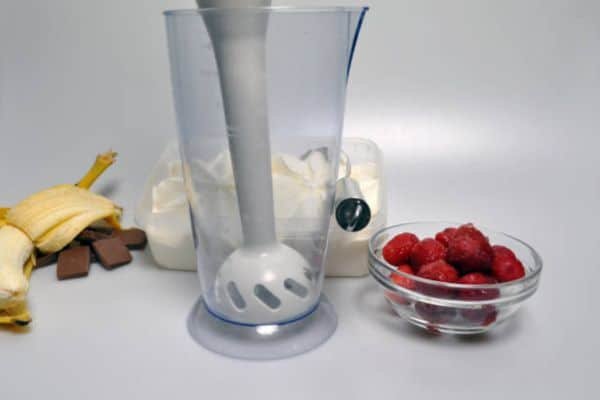
Start with two cups of frozen fruit. Use bananas, mango, berries, or a mix. Drop them straight into your Ninja blender jar.
Step 2: Pour in the Creamy Base
Add about half a cup of heavy cream or your favorite milk. Almond or coconut milk works great too. The liquid helps the blender move.
Step 3: Add Sweeteners and Extras
Squeeze in one to two tablespoons of honey or maple syrup. Drop in a splash of vanilla or a spoon of cocoa powder. Keep it simple or add your own twist.
Step 4: Blend in Pulses
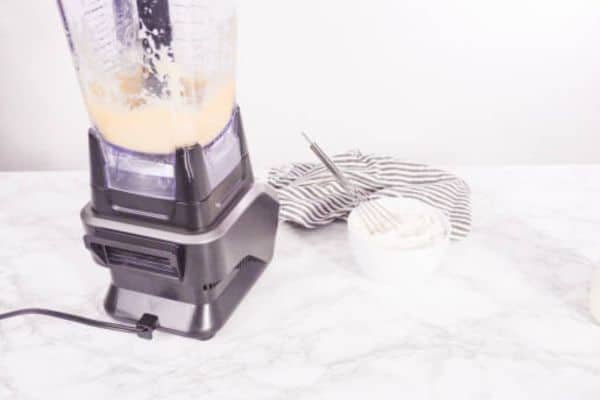
Use the pulse button to break the frozen chunks. Blend until the mix looks thick and smooth. Stop and scrape the sides as needed.
Step 5: Taste and Adjust
Spoon out a little. Add more sweetener or cream if needed. A touch more vanilla can boost the flavour.
Step 6: Freeze or Serve Right Away
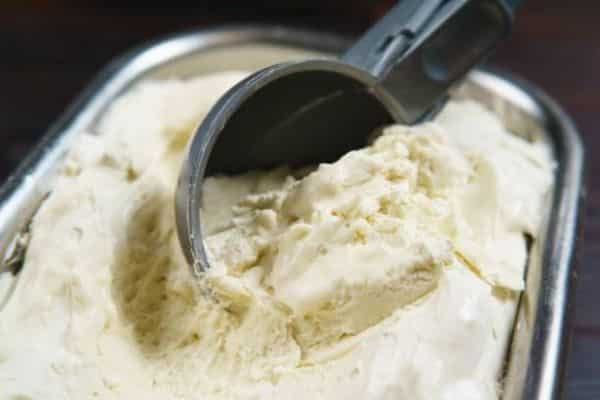
Scoop and eat it soft, or freeze it for one hour. A short chill gives it a firmer bite. Use a covered bowl or tray to store.
3 Flavour Combos to Try First
You don’t need a long list of ingredients. These combos are quick, tasty, and easy to blend — even in simple machines. Each one uses frozen fruit, a creamy base, and a little magic.
Banana Chocolate Chip
Use two frozen bananas, a splash of cream, and a spoon of honey. Blend until thick and smooth. Drop in a handful of chocolate chips and pulse once. The result feels rich, but blends fast — perfect for entry-level blenders.
Strawberry Cheesecake
Add one and a half cups of frozen strawberries, half a cup of cream cheese, and a few spoons of milk. Sweeten with maple syrup or dates. This one scoops like soft serve and tastes like a dessert shop luxury.
Mango Coconut Dream
Mix frozen mango with coconut milk and a bit of honey. Add toasted coconut for crunch. It’s smooth, tropical, and blends like a breeze — great for small motors and short blades.
Troubleshooting: Common Issues and Easy Fixes

Sometimes things go off track. Don’t worry. A few small tweaks bring everything back.
Not Blending?
Check the texture. Add one or two spoons of cream or milk. That helps the blades move. Blend again in short bursts.
Too Runny?
Add more frozen fruit. This thickens the mix fast. For a firmer texture, freeze the blend for one hour before scooping.
Not Sweet Enough?
Drop in a ripe banana or splash of maple syrup. A soft date works too. Blend again for a smoother taste.
Overheating or Stuck?
Use the pulse button. Short pulses protect the motor and blend better. Avoid running the blender on high for too long.
Is a $50 Blender Good Enough? (Yes, But Know This…)

You don’t need a high-end machine to blend frozen treats. A few low-cost blenders do the job well. It’s all about picking the right one.
Look for strong blades and at least 300 watts of power. A solid base helps keep it steady. Simple controls with a pulse button are great for thick blends.
Some of the best blenders under $50 come from trusted brands like Hamilton Beach and Black+Decker. They offer decent power and durable jars. These models work well for soft fruits and basic ice cream recipes.
Still, they have limits. The motor may heat up with hard ingredients. Blending thick mixes can take longer. You might need to stop, stir, and go again.
FAQs
Can I use fresh fruit instead of frozen?
Frozen fruit works best. It gives your mix a thick, creamy texture. Fresh fruit turns it into a smoothie.
What’s the best milk to use?
Use heavy cream for richness. Almond, oat, or coconut milk work great too. Pick what you like.
How long does it last in the freezer?
It stays fresh for up to one week. Keep it in a sealed container. Let it sit out for five minutes before scooping.
Conclusion
Making ice cream at home is fast and simple. You don’t need long steps or special tools. Just blend, scoop, and smile.
The Ninja blender turns frozen fruit into smooth magic. It makes the process fun, not fussy. You get creamy results in minutes.
No big machines. No long prep. You can start with what’s in your freezer right now.