Sharpening a hawkbill knife isn’t like sharpening a regular knife. I learned this lesson early on. The curve of the blade made it tricky. I used the wrong method at first. It didn’t work. Once I found the right approach, the knife worked like new. I could cut smoothly and easily again. A hawkbill knife is built differently. Its curved blade needs special attention. Without the right technique, the edge won’t stay sharp. A sharp hawkbill makes cutting easier and faster. Keeping it sharp is key for smooth, clean cuts. In this article, I’ll show you how to sharpen a hawkbill knife. I’ll guide you step by step. By the end, your knife will be sharp and ready for any task.
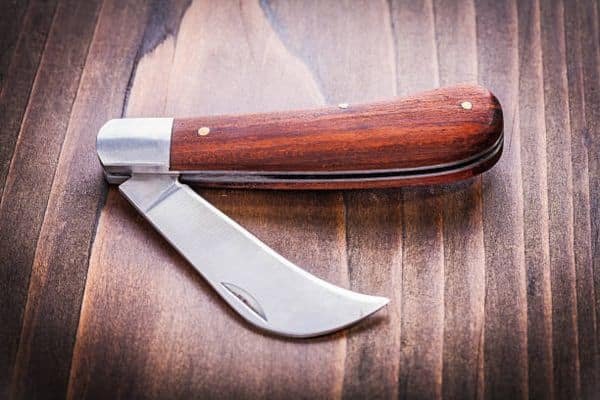
What is a Hawkbill Knife?
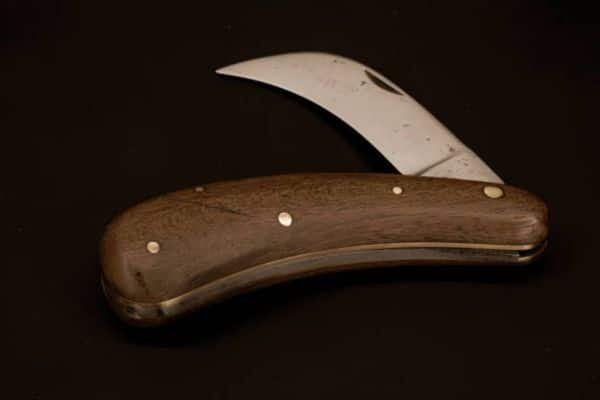
It has a curved blade. It looks like a bird’s beak. This unique shape helps make precise cuts. The curve gives it control, allowing it to work on tough jobs.
Hawkbill knives are different from regular knives. Their curved shape needs a special sharpening method. This makes them more challenging to maintain. A regular straight-edge Blade is easier to sharpen.
Why Sharpening a Hawkbill Knife Requires Special Attention
The curved blade of A knife makes sharpening more difficult. A straight-edge knife is easy To sharpen because it’s flat. The curve of the hawkbill requires A more careful approach. If you don’t follow the curve correctly, The blade won’t stay sharp.
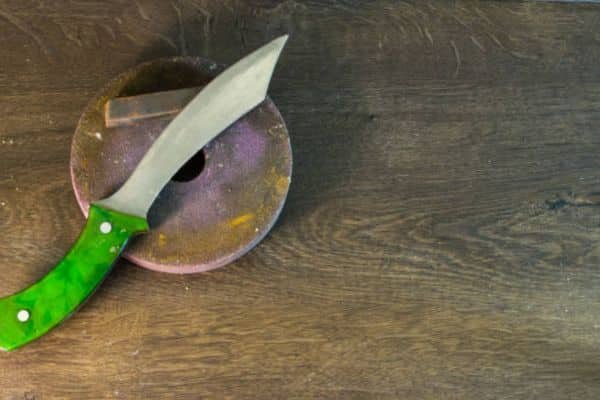
To sharpen a hawkbill, You need the right tools. A standard sharpening stone won’t work well on the curve. Curved Blade sharpeners are designed To fit the blade’s shape. These tools help maintain the edge properly and give you the best results.
Step-by-Step Guide
Gather Your Tools:
- Curved knife sharpener (or a sharpening stone)
- A honing rod (optional for fine-tuning)
- Water (if using a wet stone)
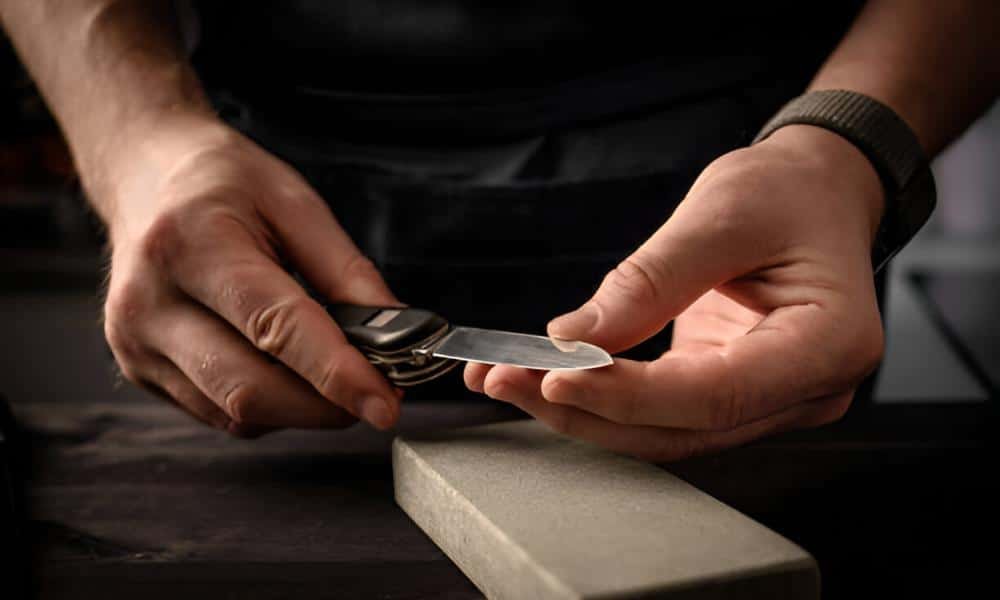
Set the Right Angle:
Start by setting the right angle. The ideal angle is usually around 20 degrees. For beginners, Hold the knife at a slight tilt, Almost like you’re trying to cut the air in front of you. This will help maintain the right angle throughout the sharpening process. If you’re using the Best kitchen knife set under 100, the process becomes even smoother and more efficient.
Sharpening Process:

- Step 1: Wet the sharpening stone (if it’s a wet stone).
- Step 2: Start at the base of the blade. Gently work your way to the tip, following the curve of the hawkbill.
- Step 3: Apply even, consistent pressure. Use long strokes to move along the entire blade.
- Step 4: Repeat on both sides to keep the blade symmetrical.
Finishing Touches:
After you’ve sharpened both sides, use a honing rod To refine the edge. This smooths out any rough spots. Test the sharpness by slicing through paper Or another soft material. A clean cut means your blade is sharp!
Tips for Sharpening Hawkbill Knives Like a Pro
Use Light Pressure:
Use light pressure. Too much pressure can damage the curved blade. The key is to let the tool do the work, not force the blade.
Regular Maintenance:
Keep your knife sharp by maintaining it regularly. Don’t wait for it To get too dull. Regular sharpening ensures it stays in top shape and ready for use.
Sharpen Frequently:
How often should you sharpen? It depends on usage. If you use the Blade regularly, sharpen it every few weeks. For lighter use, once a month should be enough.
Different Materials:
Use a curved knife sharpener for the best results. You may also try different sharpening stones for various edge types. Experiment with what works best for your hawkbill to keep it sharp and effective.
How to Sharpen Other Curved Knives (Karambit Example)
A karambit is a curved knife with a shape like a claw. It’s often used in martial arts. The curve allows for fast, controlled slashing. The grip and blade design make it a powerful tool, but sharpening it needs attention to detail.
Similarities in Sharpening:
Sharpening a karambit is much like sharpening a hawkbill knife. Both have curved blades that require special care. You must follow the curve closely and keep a consistent angle, usually around 20 degrees. A curved Blade works well for both knives.
Special Considerations:
The karambit’s handle and sharp tip require extra attention. The unique grip may make it harder to hold while sharpening. Be careful with the small tip to avoid damaging the edge. Although the process is similar, these small adjustments are important.
Choosing the Best Sharpening Tools for Curved Knives
Best Tools for Curved Knives:
Picking the right tool is crucial for sharpening hawkbill and karambit knives. A regular sharpening stone doesn’t work well on curved blades. You need a tool designed for the curve to get an even, sharp edge. Curved Blade are perfect for this job and help you maintain the blade’s shape.
Recommendations:
For a budget-friendly option, try a manual curved-blade. These are simple to use and help you stay at the right angle. A solid premium choice is the Lansky TurnBox Knife Sharpener. It gives you great control and precision. For the best results, the Spyderco Tri-Angle Sharpmaker is a top pick. It works well on both hawkbill and karambit knives.
Considerations for Beginners:
If you’re new to sharpening, Start with a curved sharpening stone or a guide-based sharpener. These tools are easy to handle And perfect for beginners. As you get better, You can move on to advanced sharpening systems. Take your time and practice To improve your skills.
Conclusion
Sharpening a hawkbill knife requires the right tools and technique. The curved blade needs careful attention. Use a curved knife sharpener and maintain the proper angle. With practice, the process becomes easier and more effective. I struggled at first, but focusing on the curve made all the difference. My tip: be patient and practice often.