Hanging shelves on plaster walls can be tricky. Unlike drywall, Itis more fragile. It can crack easily, making it harder to hang anything securely. But don’t worry—I’ve been through it and found ways to make it easier. In this guide, I’ll show you how to hang shelves in plaster walls safely and without the stress. Plus, I’ll share tips for drilling into plaster and hanging artwork. Let’s dive in and make your walls look amazing!
Understanding Plaster Walls
Plaster walls are different from drywall. Drywall is thin and easy to cut, while plaster is thick And solid. It’s made of lime, Sand, And water. It is older and more delicate. Because of this, they need extra care when drilling or hanging items.
Why Plaster Requires More Care When Drilling or Hanging Items
It can crack easily if you aren’t careful. It’s harder than drywall, which means it can be fragile. A small mistake can cause chips or cracks. This makes it tricky to hang shelves securely. You need to take extra care to avoid damage.
Why You Need the Right Tools
The right tools are key. A masonry drill bit is best for drilling into plaster. Regular drill bits won’t work as well. You’ll also need wall anchors for extra support. It doesn’t hold screws well by itself. Without anchors, your shelves won’t stay up. Proper tools ensure your shelves are secure and stay safe.
Choose the Right Spot for Your Shelf
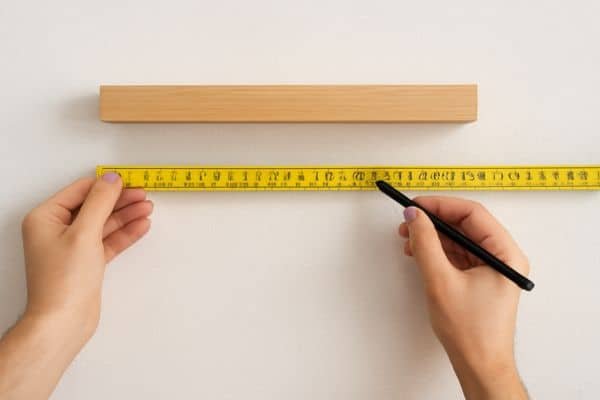
Pick the spot where you want your shelf. Think about how high or low you want it and what you will put on it. Use a measuring tape to make sure the shelf is centred. This step helps avoid crooked shelves and ensures everything fits perfectly to hang shelves in plaster walls
Find the Studs
Studs provide strong support for your shelf. Use a stud finder to locate them. Studs are the wooden beams behind the plaster, and drilling into them gives your shelf the best hold. If there are no studs where you want your shelf, anchors will help secure it to hold while style floating shelves in your living room.
Drilling Into Plaster Walls
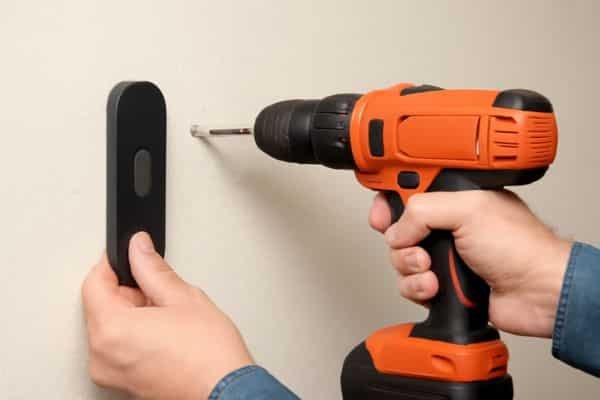
Start drilling slowly to avoid cracks in the plaster. Use a masonry drill bit for tougher plaster surfaces. Begin with a small pilot hole. This helps you avoid mistakes and control the drill better. Remember to check for studs with your stud finder before drilling.
Use Wall Anchors for Extra Support
If you can’t drill into a stud, use anchors. Wall plugs or anchors help secure heavier items like shelves. Insert the anchors into your drilled holes. Tighten them so they stay in place before attaching the shelf to hang shelves in plaster walls
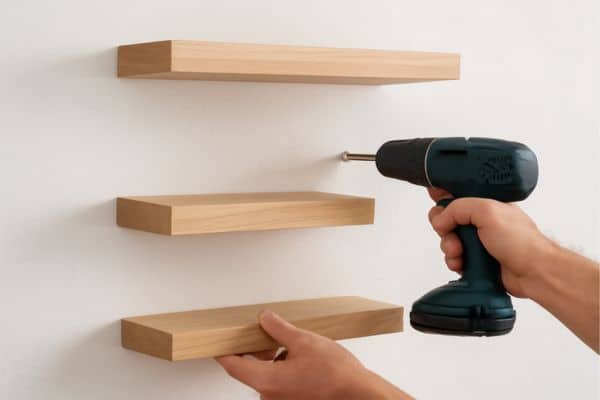
Attaching the Shelf
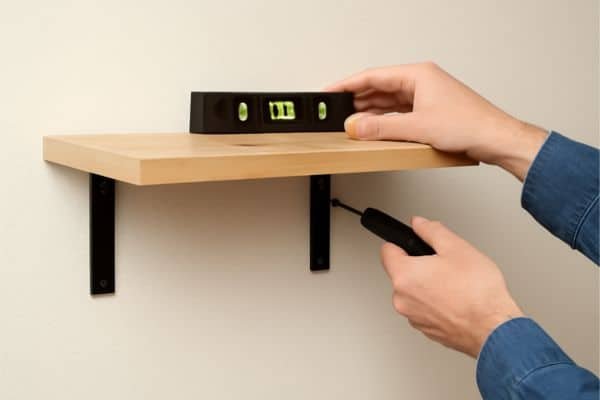
Now, attach the shelf to the wall. Screw in the brackets or the shelf itself into the anchors or studs. Make sure the screws are the right size. Use a level to ensure the shelf is straight. A level prevents any crooked shelves
How to Hang Artwork on Plaster Walls

Hanging Art vs. Shelves
Hanging artwork is similar to hanging shelves, But there are differences. Artwork is usually lighter, So it needs smaller holes and lighter anchors. Shelves need more support because they carry heavier items.
Tips for Hanging Artwork Securely
Use picture hooks or specialised wall anchors for artwork. These are designed to hold light items without damaging the plaster. Measure carefully to position your artwork just right. Always check that it’s level before making it permanent. This way, your art will stay in place and look perfect. Decorate dining room shelves – style your space with elegant shelving solutions.
Common Mistakes to Avoid When Drilling Into Plaster Walls
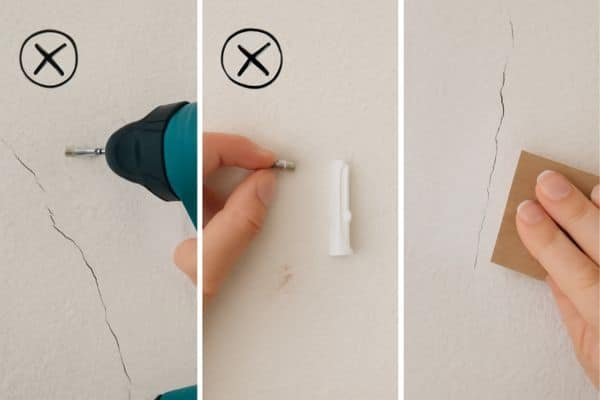
Don’t Over-Drill
Drilling too deep can crack your plaster. Go slowly and don’t apply too much pressure. Keep your drilling speed controlled to avoid damaging the wall. A small pilot hole is often enough for most screws.
Don’t Skip the Anchor
Wall anchors or plugs are essential, especially for heavier items like shelves. Without anchors, screws may not hold properly, causing your shelf to fall. Anchors spread the weight and keep everything secure.
How to Fix Cracks or Mistakes
If you accidentally crack the plaster, Don’t panic. For small cracks, Use a plaster repair kit to fill them in. Lightly sand the patched area and repaint to blend it in. This will restore the look keep your project on track.
Conclusion
It’s time to get started! Remember, take your time and follow each step carefully. Start by picking the right spot and measuring everything to ensure a perfect fit.
When drilling, be slow and steady. Use the right tools like masonry drill bits and anchors for a secure hold. Always check if you’re hitting a stud for extra support, and don’t forget to use a level to keep your shelves straight.
Hanging artwork is easier, but still requires care. Smaller holes and lighter anchors will do the job. Always make sure it’s level before you finalise the placement.